
What 3 Years of AV Setups Taught Me About Wireless HDMI
The Cable Is Not the “Safe” Option
Every time I bring up wireless HDMI in a professional AV context, someone says the same thing: “But cables are more reliable.” I get it. That was true in 2017.
Running a 30-foot cable across a conference room is a physical liability. I’ve watched cables get yanked out mid-presentation. I’ve spent 20 minutes before a client meeting hunting for an HDMI extender that someone borrowed and left in the wrong room. I’ve seen a laptop nearly go off a table when someone walked through the cable path without looking down.
The “cable equals reliable” assumption ignores setup friction, cable management overhead, and the fundamental problem that cables don’t move with people. A presenter who wants to walk the room, point at things, stand closer to the audience — a cable defeats all of that before they open their first slide.
Early wireless HDMI hardware earned the bad reputation. Systems from 2015 ran 200ms latency or worse, dropped out unpredictably on congested 2.4GHz bands, and cost $200+ for mediocre performance. That was a decade ago. The technology moved on. The misconception stuck.
Modern systems operating at 50ms or under on 5GHz bands are invisible in everyday use. The threshold where most people detect video lag is around 100ms. Below 50ms, you’d need to be looking for it. For conference room presentations, camera monitoring, digital signage, and home theater setups — wireless is now the cleaner choice for most scenarios.
How to Set Up a Wireless HDMI System Without Losing Your Mind

The Hardware You Actually Need
One transmitter (TX). One receiver (RX). That is the entire parts list.
No router. No software installation. No Bluetooth pairing sequence. No Wi-Fi network. The transmitter plugs into the HDMI output of your source — a laptop, DSLR, game console, Blu-ray player, streaming stick, or media server. The receiver plugs into the HDMI input of your display — a projector, monitor, or TV. Both units need USB power, which comes from your laptop’s USB port, a phone charger, or a power bank.
Power both units on. Wait 10–15 seconds for them to auto-pair. Video appears on screen. That is the setup process.
I’ve set up the Lemorele wireless video transmission system at $99.99 more than a dozen times across different venues — conference centers, client offices, a trade show floor, a photography studio. My personal best from bag to live video: under two minutes. Compare that to routing a 50-foot cable through a crowded room, under a floor mat, or fishing it behind a credenza.
Placement That Actually Prevents Dropouts
The biggest setup mistake people make is treating wireless HDMI like Wi-Fi and placing the transmitter wherever it’s convenient. Don’t do that.
The TX unit needs a relatively clear path to the RX unit. Not necessarily line-of-sight, but clear enough that the signal isn’t bouncing through metal cabinets or multiple concrete walls. What I’ve found actually works in practice:
- Place the TX on top of your laptop or source device — never inside a bag or under papers
- Mount the RX above the display rather than behind it; elevated placement cuts multipath interference significantly
- Keep both units at roughly the same height when possible
- In rooms with metal ceiling grids (common in commercial spaces), expect range reduction of 30–40%
- If the units have external antennas, point them toward each other rather than running parallel
At a trade show setup, I had the TX buried under presentation printouts on a table. Dropouts every 45 seconds — completely reproducible. Moved the unit to the open corner of the table. Zero dropouts for three hours. Same hardware, same room, completely different result. Placement matters more than most people expect.
The Loopout Feature Most Reviews Ignore
One detail that separates mid-range wireless HDMI systems from budget hardware: HDMI loopout on the transmitter. This means the TX unit has two HDMI ports — one to receive signal from your laptop, one to pass that same signal to a local display via cable. You’re sending wirelessly to the projector at the front of the room and simultaneously running a cable to the monitor on your desk. Both show the same image.
If you need to see your presenter notes on a laptop display while the audience sees your slides on a different screen, loopout solves this without a signal splitter or extra hardware. It’s a feature that typically appears on systems costing $150–$200. Having it at the $99.99 price point is worth noting when you’re comparing options.
Power Requirements in Practice
Both TX and RX units draw power via USB-C at 5V/1A. A standard phone charger works. So does your laptop’s USB-A port. A 10,000mAh power bank keeps the system running for a full-day event without a wall outlet near the projector — useful for pop-up setups and events in spaces not designed for AV equipment.
Mac users will need a USB-C to HDMI adapter. The Anker 518 at $13 works cleanly. Apple’s own adapter at $29 also works but there’s no practical difference in signal quality. Chromebooks with full-size HDMI connect directly.
50ms Latency: The Only Spec Worth Caring About
Human perception of video lag becomes noticeable around 100ms. Below 50ms, it’s invisible in normal use — you’d need to be deliberately looking for it. Modern wireless HDMI systems at this price tier run at 50ms ultra-low latency, which puts them squarely in the imperceptible range for presentations, video playback, camera monitoring, and digital signage.
The only cases where 50ms matters: competitive gaming (you need under 10ms for fast-reaction titles), live audio-video sync work in broadcast production, and any application where you’re watching your own hands move on screen. For everything else — which is 95% of what people actually use wireless HDMI for — it’s a non-issue.
Five Real Situations Where I Replaced Cables with Wireless
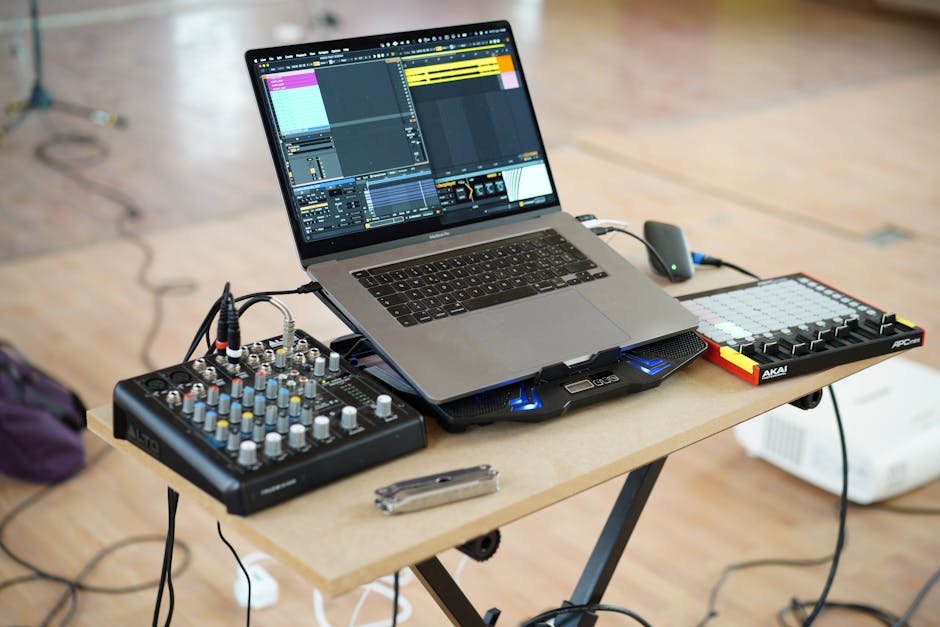
These are actual setups, not hypotheticals.
- Conference room with rotating presenters. The receiver stays permanently plugged into the room display. Any visitor connects in under 90 seconds without installing software or borrowing a dongle. The system works regardless of what OS their laptop runs.
- Photography client review sessions. DSLR connected to TX via HDMI out. Large monitor connected to RX. The client sees every shot full-screen as it’s taken, without a cable running across the shooting floor or getting tangled in light stands.
- Home theater source switching. Gaming PC in a rack cabinet, projector mounted across the room. Wireless link eliminates cable routing through the ceiling or along baseboards. The RX mounts directly on the projector body.
- Retail digital signage. Promotional display placed wherever it makes visual sense — no constraint from cable run length. TX at the POS terminal, RX at the display. Moved the display three times in one afternoon for different layout tests. Zero recabling.
- Live event presentations. Speaker at a podium at the front, projector screen at the back. Single wireless link. No cable running down the aisle through the audience space.
The pattern is consistent: wireless wins wherever cables create a mobility, routing, or management problem. For a laptop plugged into a desk monitor that never moves, a $12 Monoprice HDMI cable is still the right answer. Don’t add wireless complexity where a cable works cleanly.
For multi-presenter conference rooms specifically, the expandable architecture of the Lemorele G500 8-in-1 wireless presentation system at $94.99 handles the rotation problem well — the charging dock keeps multiple TX units ready at the table, and whoever’s presenting grabs one and connects. The G500 runs at 5.8GHz specifically to reduce interference in Wi-Fi-dense office environments, which matters in buildings with 20+ competing wireless networks.
Wired vs. Wireless HDMI: The Trade-offs Nobody Admits Out Loud
Wireless HDMI is not better than wired HDMI in every situation. The resolution ceiling is real. The latency floor exists. Here’s the comparison without the usual sales-pitch framing:
| Factor | Wired HDMI | Wireless HDMI (current tier) |
|---|---|---|
| Setup time | 2–20 minutes (routing dependent) | Under 2 minutes |
| Latency | ~0ms | ~50ms |
| Max resolution | 4K@120Hz (cable dependent) | 1080P@60Hz |
| Effective range | Up to 50ft standard; active cables extend further | 80–100ft indoor; 200M line-of-sight outdoor |
| Cable clutter | High | None |
| Interference risk | None | Low (5GHz band congestion in dense offices) |
| Cost | $10–$80 (cable + extender) | $95–$150 (TX+RX kit) |
| 4K support | Yes | No at this price tier |
| Portability | Limited by cable length | Full room mobility |
The 4K limitation is real and I won’t minimize it. If you’re running a 4K projector and presenting from a Retina MacBook with a 4K-native deck, you’ll be downsampling to 1080P. For most conference room slides and video content, the audience won’t see a difference at projection sizes. For video editing review or high-resolution image grading work, you need a wired connection or a broadcast-grade system.
The Hollyland Mars 300 Pro at around $300 handles 1080P@60Hz with broadcast-quality reliability and lower latency options — it’s the step up for live event AV professionals. The J-Tech Digital wireless HDMI extender covers 4K if resolution is non-negotiable. Both cost significantly more and are overkill for presentation use cases.
My position: for conference rooms, classrooms, home theaters, and general presentation work, 1080P@60Hz is completely sufficient. The cases where you genuinely need 4K over wireless are narrow and expensive to solve. Pick your battles.
Questions I Get Asked Every Time I Deploy This in a New Space
Does it work with a Mac without extra software?
Yes. The system is display-agnostic — it transmits whatever comes out of the HDMI port without caring what generated it. macOS sees the TX unit as a standard external display. No driver installation, no configuration screen. Connect the adapter, plug in the TX unit, the display appears in System Preferences immediately. Same experience on Windows and Chromebooks.
What happens when two wireless HDMI systems run in the same room?
Modern systems pair TX to RX units during manufacturing or on first power-up, creating a dedicated channel relationship between the two devices. Two kits running simultaneously in the same physical space generally don’t cross-feed. I’ve run two separate Lemorele kits in a split conference room with the divider open and had zero crossover between the two feeds across a full-day session. For large venues with many simultaneous wireless HDMI setups — trade shows, multi-room event centers — test the combination before the event, but isolated pairing is standard behavior at this tier.
Can multiple presenters share one display without swapping hardware every time?
Not with a standard 1TX+1RX kit, which is strictly point-to-point. For this use case, you need the expandable TX architecture of the Lemorele G500. The charging dock keeps three or four transmitter units topped up at the conference table; whoever’s presenting next grabs one and connects. The display stays locked to whichever TX is active. It’s the right solution for rooms where presenter rotation is the primary workflow.
Will it actually reach through the walls of a typical office?
Through standard drywall: yes, reliably at 80–100 feet. Through concrete block or brick: expect significant degradation. Through a metal equipment rack positioned between TX and RX: plan around it. The 200M spec in the product listing is outdoor, unobstructed line-of-sight. Realistic indoor performance in a standard commercial build is 40–50% of that figure. For any conference room under 100 feet long, this is more than sufficient — I haven’t encountered a standard meeting room where this was a limiting factor.
Which System to Buy Based on What You Actually Do
The Nyrius ARIES Pro was my go-to for years. Firmware updates stopped, and the TX units have started showing unreliability after heavy use. The IOGEAR GW3DHDKIT is competent but costs more and doesn’t include loopout. For 2026, the Lemorele systems sit at the right price-to-performance point for most professional and home use cases.
My picks:
- Solo presenter, home office or small meeting room: the Lemorele 1T+1R kit at $99.99 — plug-and-play setup, HDMI loopout on the TX, 200M rated range, no configuration required. The loopout alone is worth the price delta over cheaper kits.
- Conference room with multiple rotating presenters: Lemorele G500 at $94.99 — expandable TX architecture, charging dock, 5.8GHz frequency for dense office environments. Built specifically for this workflow.
- Broadcast, live events, or 4K-critical review: Hollyland Mars 300 Pro (~$300) or a fiber HDMI extender. Don’t compromise resolution for workflow convenience at this level.
- Short fixed run under 15 feet, nothing moving: Monoprice or AmazonBasics HDMI cable. No wireless hardware needed.
| Use Case | Product | Price | Deciding Factor |
|---|---|---|---|
| Home / small office presenter | Lemorele 1TX+1RX | $99.99 | HDMI loopout + plug-and-play |
| Multi-presenter conference room | Lemorele G500 | $94.99 | Expandable TX, charging dock, 5.8GHz |
| Broadcast / live production | Hollyland Mars 300 Pro | ~$300 | Broadcast-grade reliability, lower latency options |
| Fixed short-run installation | Monoprice HDMI cable | $10–15 | No wireless overhead required |